
---
STEPS
1) Run AutoCAD 2014.
If you are using Windows XP, you should be able to find it under All Programs group.

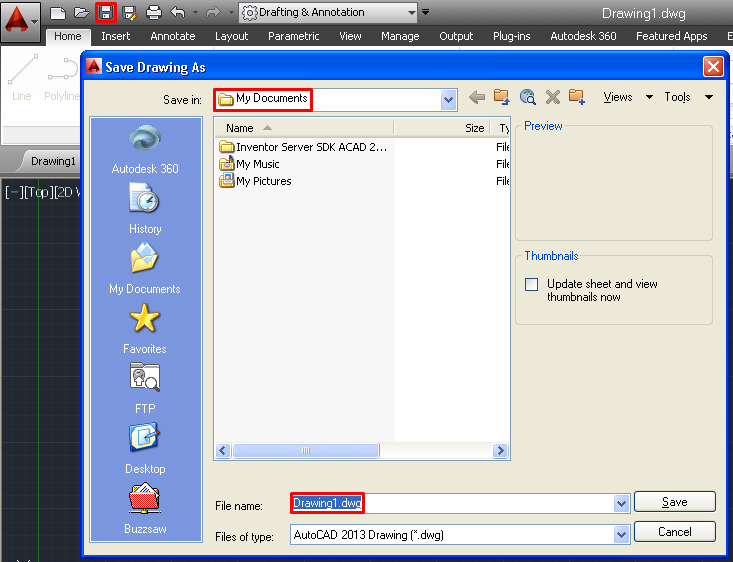
2) Main Application Window
Notice that by default your design is named as Drawing1.dwg

If you click the Save Button, the file will be saved to My Documents, unless you change it to other location.
3) Home Tab and Draw Group.

The Home Tab consists of few button groups.
The most important one is the Draw Group.
For beginners, drawing Line, Polyline, Circle and Arc will give you basic exposure before attempting other complicated tasks.
4) Drawing Lines.
4.1) Position your mouse on the drawing area.
Notice that the cursor turns yellow if it is exactly at the grid intersection.

4.2) Click the point and move your cursor down. Don’t click yet.

4.3) Click the second point.
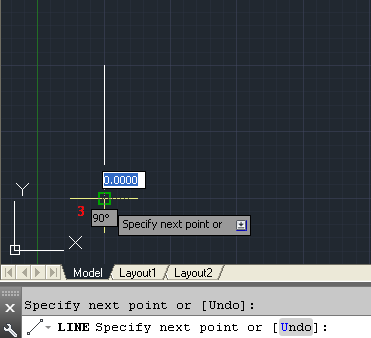
4.4) Click the third point to form an “L” shape.

5) Selecting a Line object
5.1) Hover your mouse over the Line that make up the height of the “L” shape.
The important nodes of the selected line are highlighted as blue dots.

5.2) Hover to the top node.
5.3) Hover to the middle node.
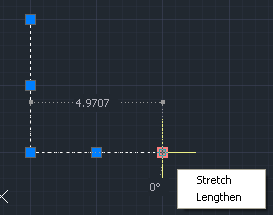
5.4) Hover to the bottom node.
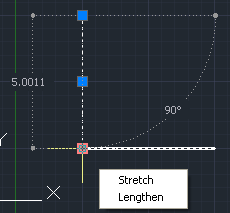
As you can see in the step above, the control node shows you some information that may guide you to perform further edits.
The middle node doesn’t contain any coordinate reference information.
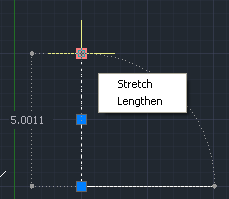
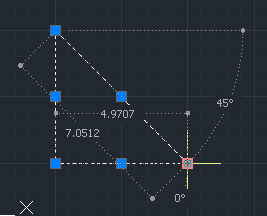
5.5) Click the other remaining Line.

5.6) Now if you hover over the bottom node in Step 5.4, you would get more information because the node is connecting to two other control nodes.

5.7) If you hover over the third control node, you get some information.
However, if you compare against Step 5.2 and Step Step 5.4, you would notice that there is no Angle Reference path.
This tells us that, by default, when a line is drawn to the right of a control node, it moves in 0 (zero) degree angle.
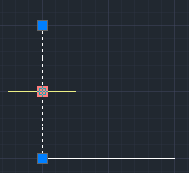
5.8) Press [ESC] Key to deselect the lines.

6) Drawing a triangle using three Lines.
6.1) Draw another line to form a triangle.

6.2) Select the lines again and hover over the bottom node.
You should see more information on that node because it is connected to two points now.
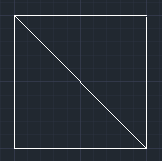
7) Draw a box using four lines.
7.1) Draw a box as shown below.
7.2) Select all lines and hover over the node that you have selected in Step 6.2)
Press [CTRL]+A to select all lines at once.
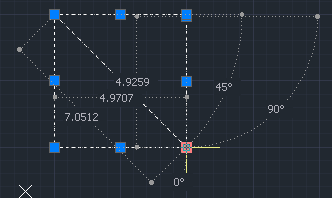
From this exercise you learn that a node contains information about its relationship with other nodes that it is connected to.
The relationship is either expressed in Coordinate or a combination of Angle and Length information.
---
No comments:
Post a Comment