
---
AUTOCAD FUNDAMENTALS 102 (Drawing Tools Overview)
Contents
1) HOME TAB
- Run AutoCAD.
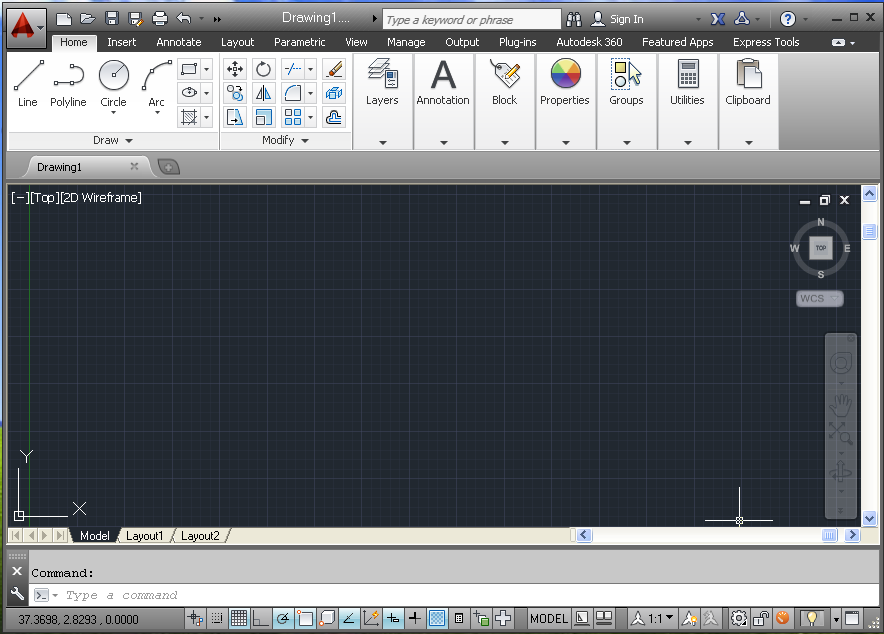
- Find the Home Tab.
By default, Home Tab is the active Tab when AutoCAD starts.
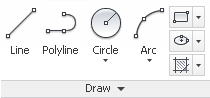
- Under Home Tab, Find the Draw Group.
It should be on the leftmost side of the ribbon.
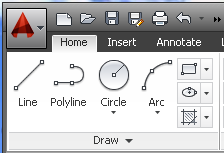
- We are going to examine how the button works.
1.4.1) Hover your mouse over the Line button. Don’t move or click your mouse.
A help dialog pops up.

1.4.2) After a short pause, the help dialog grows to show you more information on how to use the tool.

- By looking at the example displayed in the Help Dialog, we would be able to use the tool correctly.
- There are four main drawing tools here.
We are going to use them in the following steps.
At this point, we don’t expect to go into details.
So, we will just click the button and follow the given examples without paying attention to any coordinates, distances, angles or measurements.
2) LINE Tool
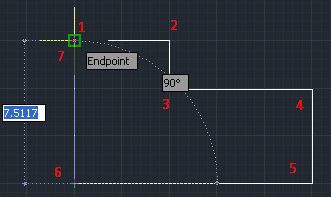
2.1) Hover the mouse over the Line Button and wait for the AutoCAD to show the example.

2.2) Click the Line Button and draw the line by following the example above.
Don’t worry about the details. Click three points and then press [ESC] o [ENTER] Key.

3) POLYLINE Tool.
3.1) Hover the mouse over the PolyLine Button and wait for the AutoCAD to show the example.

3.2) Click the button and draw according to the given example.
4) CIRCLE Tool.
4.1) Hover the mouse over the Circle Button and wait for the AutoCAD to show the example.

4.2) Click the button and draw according to the given example.

5) ARC Tool.
5.1) Hover the mouse over the Arc Button and wait for the AutoCAD to show the example.

5.2) Click the button and draw according to the given example.

6) Done
We have drawn four basic drawing objects.

DOWNLOAD: Completed Project File
---
No comments:
Post a Comment